


Sign In / Sign Up To Add Wishlist
Wishlist is available for members only. Please sign in or sign up to add your wishlist.
Making DIY Christmas Gift Tags & Labels

You’ve found the gifts and stocked up on wrapping paper but before the actual wrapping begins, a little personalisation can make each present feel even more thoughtful! Whether it’s a name on a gift tag, a favourite photo on a label or a message printed on ribbon - these tiny details add something that shop-bought wrapping alone can’t say.
This guide covers easy DIY Christmas gift tags, colourful labels and a few ways to make your wrapping your own, with Brother products to suit each project.
| What to make | A simple way to make it | Brother option to consider |
| Personalised card gift tags | Attach a printed name label to a card blank | PT-P710BT / PT-D410 with suitable adhesive TZe tape |
| Full-colour Christmas labels | Print a photo or colourful design onto an adhesive label | VC-500W with suitable CZ label rolls |
| Personalised ribbon | Print a short message onto ribbon and tie it to your gift | PT-P710BT / PT-D410 with suitable TZe ribbon tapes |
| Printable gift tags | Print a template, cut it out and add your message | A Brother inkjet printer and Brother Creative Center templates |
Already have a Brother printer or labeller at home? Check what it can do before adding anything to your shopping list. A few card blanks and the right supplies might be all you need.
How to make DIY Christmas gift tags with label tape
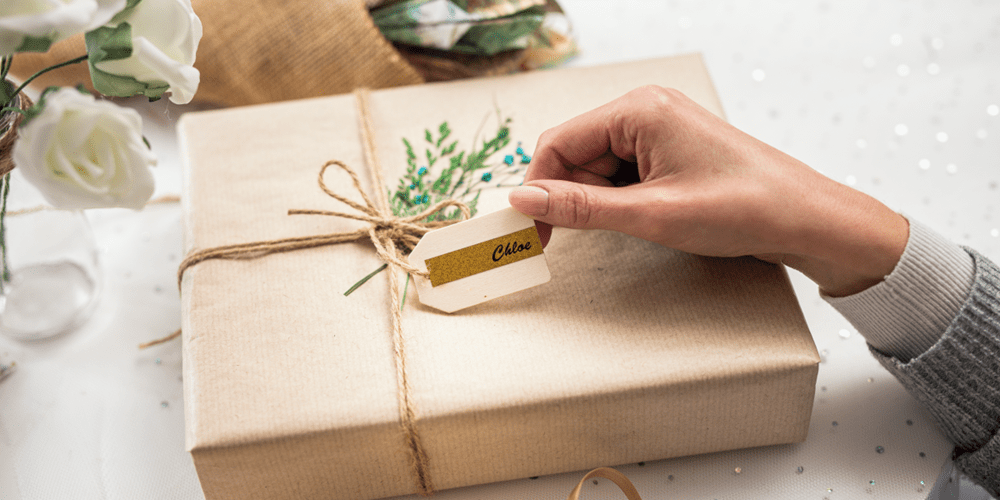
Let your choice of card colour become part of the design. Brother TZe-131 Black on Clear tape prints black lettering on a transparent background, allowing the colour of your gift tag to show through. Pair it with light-coloured card for names and messages that are easy to read. Or give your tags a little festive shine with one of these premium options:
- TZe-PR831 Black on Premium Gold, 12 mm: Pair with deep green or burgundy card for a classic Christmas look, or kraft card for a warm finishing touch
- TZe-PR234 Gold on Premium White, 12 mm: Try it on white card with gold ribbon for a coordinated finish, or let the white label stand out against a darker tag
- TZe-PR935 White on Premium Silver, 12 mm: Team with navy or pale blue card for a cool Christmas colour palette. Keep the message short and the lettering clear so it’s easy to read
You’ll need: a Brother PT-P710BT / PT-D410 label maker, Brother TZe label tape, card tag blanks, a hole punch, and ribbon or twine.
- Choose your card and tape. Try kraft card with natural twine or pale-coloured card with festive ribbon. Leave enough room for your printed message and a punched hole.
- Create your message. With the PT-P710BT, design your label on a compatible smartphone using Brother Design&Print2. On the PT-D410, use the built-in keyboard and controls. Start with the recipient’s name or a short greeting, such as “Merry Christmas, Mia!” Choose a clear font and preview your design before printing.
- Print and check. Print one sample and hold it against your card before removing the backing. Check the spelling, size and contrast against your chosen colour.
- Finish your tag. Apply the label, punch a hole away from the lettering and thread through ribbon or twine.
Making a whole set? Keep the same label layout and change the names, then vary the card colours to suit each recipient.
Explore Brother’s labelling tapes to find the finishing touch for your personalised Christmas gift tags.
How to make Christmas labels for gift bags and boxes
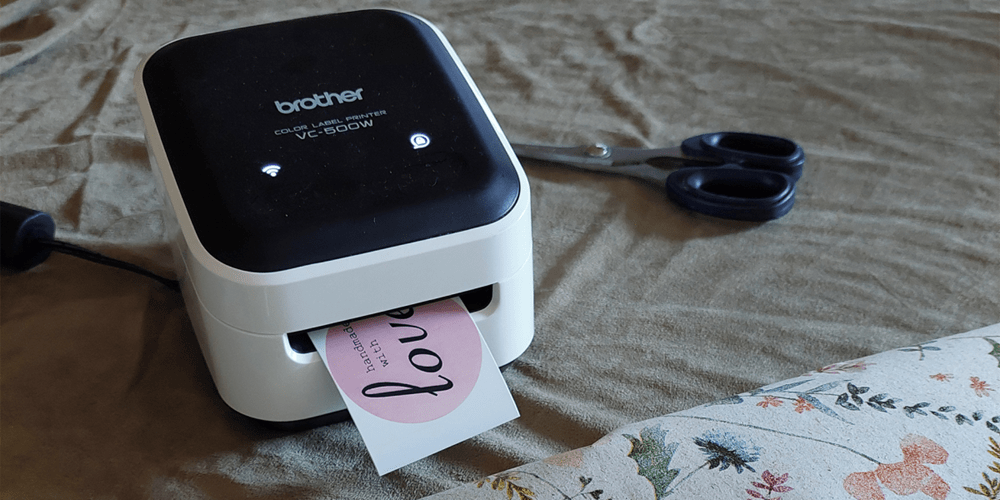
Give plain packaging a personal touch with colourful names, festive messages or a favourite photo. The Brother VC-500W colour label printer prints full-colour designs using Brother CZ label rolls, with no separate ink cartridges needed. Choose a roll width to suit your packaging:
- Brother CZ-1004 full-colour label roll, 25 mm: Try a name and a small festive detail on gift bags or smaller boxes. A short “Made with love for Grandma” can be just right for homemade biscuits.
- Brother CZ-1005 full-colour label roll, 50 mm: Make room for a favourite photo, a decorative border or a longer message on larger packaging. A familiar face makes finding your present under the tree that little bit easier!
You’ll need: A Brother VC-500W, a CZ label roll, a compatible smartphone or tablet with the Brother Color Label Editor 2 app, and your gift bags, boxes or containers.
- Choose your packaging and roll. Measure the space where your label will sit, then choose a roll width to suit. Look for a smooth, flat area and match your design dimensions to the available space.
- Create your design. Open Brother Color Label Editor 2 and choose from fonts, frames and backgrounds, or add a photo from your device. Pair a short message with one decorative detail, keeping the main text large enough to read. Preview your layout at the roll width you’re using.
- Print and check. Print one sample and check the spelling, size and colours. Test it on a clean, dry area of the packaging before making the full set, as textured, curved or coated surfaces can affect how well a label sits.
- Finish your gift. Peel off the backing and apply your label, smoothing it into place. For homemade edible gifts, attach the label to the outside of the box, bag or container.
Once you’re happy with the result, reuse the design and change the names or messages. It’s a simple way to give every gift a coordinated finish!
Add personalised ribbon to your Christmas wrapping
Give your wrapping a finishing touch with a name or greeting printed on ribbon. Tie it around a small gift box, loop it through a gift bag handle or thread it through your personalised gift tags. Choose a Brother TZe ribbon tape to match your Christmas colours:
- TZe-RW34 Gold on Wine Red ribbon, 12 mm: Pair with kraft paper or plain white gift boxes for a classic Christmas finish.
- TZe-R234 Gold on White ribbon, 12 mm: Try it with colourful wrapping or a simple white-and-gold theme for a softer finishing touch.
You’ll need: A Brother PT-P710BT or PT-D410 label maker, a suitable TZe ribbon cassette, and your wrapped gift, gift bag or card tag.
- Choose your ribbon. Pick a colour that works with your wrapping and decide how you’ll attach it. Allow enough length to go around the gift or through the tag, with extra room for a knot or bow.
- Create your message. With the PT-P710BT, design your message on a compatible smartphone using Brother Design&Print2 and print via Bluetooth. On the PT-D410, use the built-in keyboard and preview your design on the display. Keep the wording short, such as “For Dad, with love” or “Made just for you”.
- Print and check. Print a sample to check the spelling, readability and spacing. Leave plenty of ribbon on either side of the message so the wording stays visible once tied, and follow your model’s instructions for printing and cutting ribbon.
- Finish your wrapping. Tie the ribbon around your gift, loop it through a bag handle or thread it through a card tag. TZe ribbon is non-adhesive, so secure it with a knot or bow and position the message where it can be seen.
Making a whole set? Keep the same font and greeting, then change the names for each recipient. Even a very familiar pair of socks feels a little more considered with a ribbon made just for them!
Explore Brother’s labelling tapes to find a ribbon that brings your Christmas wrapping together.

Printable Christmas gift tags for an easy starting point
If you’d prefer a ready-made design, explore the printable Christmas gift tags in Brother Creative Center. Choose a design you like, print it with Brother inkjet printer like the Brother DCP-J1260W or the Brother MFC-J4355DW and add the names and messages.
Before printing, check the template’s page size and your printer’s supported paper types and weights. Preview the layout and print a sample to check the size. If your printer doesn’t support the card you’d like to use, print on suitable paper and attach the cut-out design to a separate card blank.
Finish with a punched hole and twine, or attach the tag to a gift bag. It’s a handy option when you want to spend more time wrapping and less time deciding which font looks most festive.
Make custom Christmas gifts tags and labels with Brother
A thoughtful gift deserves a finishing touch that feels like you. Start with a simple name label, try a favourite photo or add a message to the ribbon. You don’t need to turn the dining table into a craft workshop to make someone smile.
Explore Brother label makers and suitable label tapes and rolls to find what suits your next Christmas project. However you wrap it, Brother is at your side.
Comments

DIY Christmas Gifts to Make at Home in 2026
Make Christmas personal with these DIY gift ideas, from recipe keepsakes to handmade activity packs. Find practical tips, printable resources and Brother tools.

What's the Best Printer for Small Business?
Find the best printer for small business. Compare inkjet, laser and A3 printers based on your team, workload and office needs.

A Practical Guide to Electrical and Data Labelling Templates
Explore how Bluetooth workflows, compliant templates and advanced printing tech from Brother simplify durable electrical and warning labels for electricians.

Resource Library
Explore our range of eBooks, Whitepapers & Case studies
Be the first to receive ongoing exclusive offers and the latest news on our products and services directly in your inbox!