


Sign In / Sign Up To Add Wishlist
Wishlist is available for members only. Please sign in or sign up to add your wishlist.
DIY Christmas Gifts to Make at Home in 2026

There’s something lovely about opening a present and realising someone made it just for you. A family recipe in familiar handwriting, a little book of favourite photos or a bookmark in exactly your favorite colour - these small details can make a gift feel wonderfully personal!
And no, you don’t need a craft room that would make Santa jealous.
If you’re looking for DIY Christmas gifts, start with something that suits your skills and the supplies you already have. Printed recipe cards, photo keepsakes and bookmarks are great options for beginners.
Here are five handmade Christmas gift ideas to get you started, with practical tips and Brother tools to help along the way.
| DIY/Handmade gift idea | A lovely fit for | What you’ll use |
| Family recipe keepsake | The family foodie or someone moving soon to another country | Printer, paper and a recipe box or folder |
| Photo memory booklet | Grandparents, partners and close friends | Printer, photographs and a blank booklet |
| Personalised bookmark set | Readers, teachers and book-club friends | Printer, paper, backing card and scissors |
| Christmas activity pack | Children who enjoy colouring and making | Printer, printable activities and colouring supplies |
| Framed paper keepsake | A new household or someone celebrating a milestone A new household or someone celebrating a milestone | Printer, frame and scissors |
1. Keep a family favourite close with a recipe keepsake
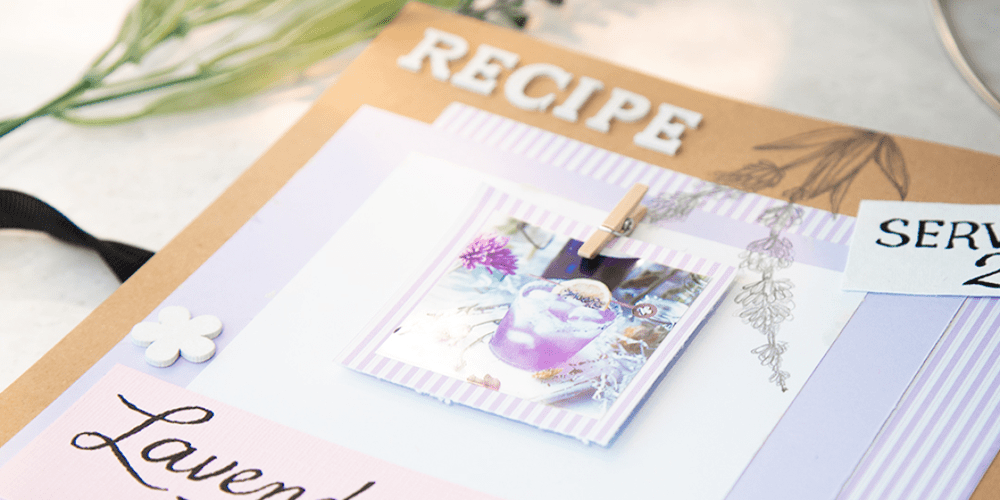
A collection of favourite recipes makes a thoughtful gift for someone who loves to cook, especially when the recipes come with a story. Think Grandma's Christmas pudding, Dad’s barbecue marinade or the biscuits that never quite make it to the tin.
If you have handwritten originals, keep those familiar notes and flour-dusted memories part of the gift by scanning them for your collection!
You’ll need: Several family recipes, printer with scanning capability, paper and a small recipe box or folder sized to fit your finished pages. For A5 recipe pages, the Brother DCP-J1800DW Print & Cut can print onto A4 paper and automatically cut it into A5.
- Choose five to seven recipes and check that the ingredients, quantities and instructions are complete.
- Scan handwritten originals to preserve the familiar handwriting. Check that each scan is easy to read, then arrange your recipes in an A5 layout. If you don’t have handwritten copies, type them into a simple design instead.
- Add a short memory beside each recipe, such as who makes it or when your family serves it.
- Print a test page to check the text size and layout. With the DCP-J1800DW, use the Print & Cut setting to produce A5 pages from A4 paper, then arrange the finished collection in your box or folder. If you’re using another printer, print and trim the pages to fit.
Need a festive starting point? Brother Creative Center has a free holiday recipe card you can download.
Check its dimensions before choosing your box or folder - the template may need a different layout from the A5 collection above.
2. Turn favourite photos into a memory booklet
Once you’ve shared a favourite recipe, why not share a few favourite moments? A small photo booklet makes a thoughtful gift for grandparents, partners or close friends, especially when the pictures tell a story you share. Think family holidays, your child’s year in pictures or the ordinary moments that still make you smile.
Give those favourites on your phone somewhere new to live. The slightly wonky group photo can absolutely make the cut!
You’ll need: Digital photos, a colour printer, compatible photo paper, a blank scrapbook or booklet and photo-safe adhesive. The Brother DCP-J1800DW Print & Cut can print your photos using supported photo paper, ready to arrange in your booklet.
- Choose your photos. Pick a theme that means something to the recipient, then select a manageable set of pictures. Arrange them in the order you’d like to tell the story.
- Plan your pages. Check the booklet’s page size and decide how many photos will fit comfortably. Add a date, place or short caption to your print layout, or leave room to write these by hand.
- Print and check. Preview each image at its intended print size so faces and important details stay in the frame. Print a test photo using the appropriate paper type and settings, then print the rest and allow them to dry before handling.
- Bring it together. Arrange the photos on each page before securing them with photo-safe adhesive. Add your captions and finish with a handwritten message inside the cover.
For an extra personal touch, leave a few pages blank for memories still to come. You could even add a little note: “To be continued…”
Check your printer’s supported photo paper types and sizes before printing, and choose print dimensions that fit your booklet.
3. Make a bookmark set for someone who always has a book on the go
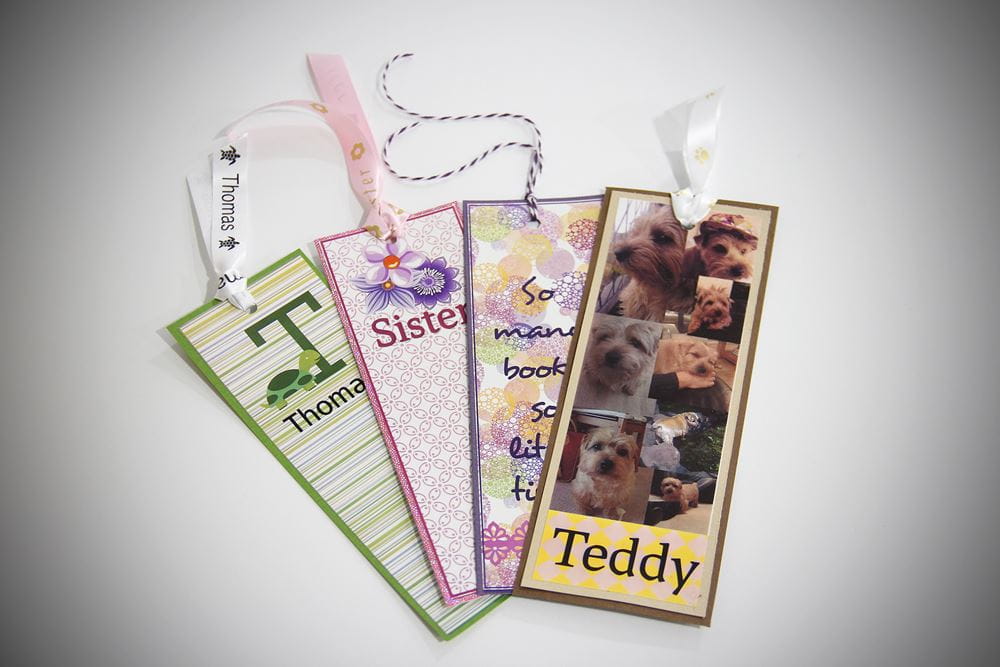
Small in size but big on personality, personalised bookmarks make easy DIY Christmas gifts for the book lovers on your list. Think a favourite colour, an original illustration or a little message that makes them smile, like “You paused your book for this. It had better be good!”
Make a matching set or give each bookmark its own personality. There’s room for holiday novels, well-loved cookbooks and the bedtime story that gets requested every night.
You’ll need: An inkjet printer, compatible paper, thin backing card, glue and scissors. The Brother DCP-J1260W inkjet printer can print your colourful designs, ready to mount onto card and cut into individual bookmarks.
- Create your designs. Arrange several narrow rectangles on one page, leaving space between them for cutting. Choose colours and illustrations that suit the recipient.
- Add a personal touch. Include their name or a short message, keeping the lettering comfortably inside the edges. Print a test page to check the size and readability.
- Print and mount. Print your finished designs using the appropriate paper settings and allow the ink to dry. Glue the sheet onto thin backing card for extra firmness, smoothing it flat and allowing the glue to dry.
- Cut and package. Cut out each bookmark and keep the finish flat so it sits comfortably between pages. Tuck the set inside a book or envelope with a handwritten note.
For an extra personal touch, pair each bookmark with a book recommendation. You might just introduce them to their next favourite read!
Already have a Brother DCP-J1800DW Print & Cut? You can use it to print your designs too. Its automatic cutter divides A4 sheets into A5, so you’ll still need scissors to cut out the individual bookmarks.
4. Put together a Christmas activity pack for kids
A printed activity pack makes a thoughtful gift for children who love colouring and creating. Add pencils or crayons, and you have a little collection ready for a quiet afternoon - or those Christmas morning minutes when the grown-ups are still making coffee.
Choose activities around their favourite things, then give the pack a personal touch with their name on the cover.
You’ll need: A printer, paper, age-appropriate printable activities, colouring pencils or crayons, and a folder or envelope. An inkjet printer like the Brother DCP-J1260W can print the activity pages and a colourful cover to bring the pack together.
- Choose your activities. Pick a small selection to suit the child’s interests and abilities. Mix colouring pages with other printable activities, checking that the instructions are easy to follow.
- Create a personal cover. Add the child’s name and a festive design, leaving a space for them to draw their first masterpiece. Size the cover and activity pages to fit your folder or envelope.
- Print and check. Preview the layouts and print a test page to check the size and clarity. Print the remaining pages using the appropriate paper settings, then allow the ink to dry.
- Put the pack together. Arrange the pages in the folder or envelope, with the colouring supplies alongside them. Add a little note inviting the recipient to get creative.
Start with these free Christmas colouring pages, then explore the Brother Creative Center Christmas collection for more festive inspiration.
Leave a blank page inviting them to draw their favourite Christmas memory. That one might become a gift for you!
5. Print and frame a keepsake with a story behind it
A travel photo or an illustration of a first home can turn a simple print into a thoughtful Christmas gift. You could even use a favourite family saying, like “We’ll leave in five minutes.” A classic, even if nobody's ever meant it!
Choose a memory that means something to the recipient, then let it take centre stage. A name, date or short message can help tell the story.
You’ll need: An inkjet printer, compatible paper, a frame and a digital design or photo. The Brother DCP-J1260W can print your chosen design, ready to frame and give.
- Choose your design and frame. Pick a photo, illustration or saying, then measure the frame’s display area. Create your layout in your preferred design app, allowing for any edges the frame or mount will cover.
- Make it personal. Add a name, meaningful date or short message. Keep text and important details comfortably inside the visible area so nothing gets hidden when framed.
- Print and check. Print a draft to check the size, spelling and colours. Once you’re happy with the layout, print the finished design using paper your printer supports and the appropriate print settings.
- Frame your keepsake. Allow the ink to dry before placing the print in the frame. Add a handwritten note on the back explaining the story behind it - a little extra detail for them to discover.
For an extra personal touch, match the design to a milestone: the year they moved into their first home, the place you met or a trip you still talk about.
Check your printer’s supported paper types and sizes before choosing thicker or photo paper, and make sure your finished print fits the frame.
Add the finishing touches to your handmade DIY gifts
With the making done, a handwritten message or a little personalised ribbon helps bring everything together. It also settles the all-important question of whose present is whose.
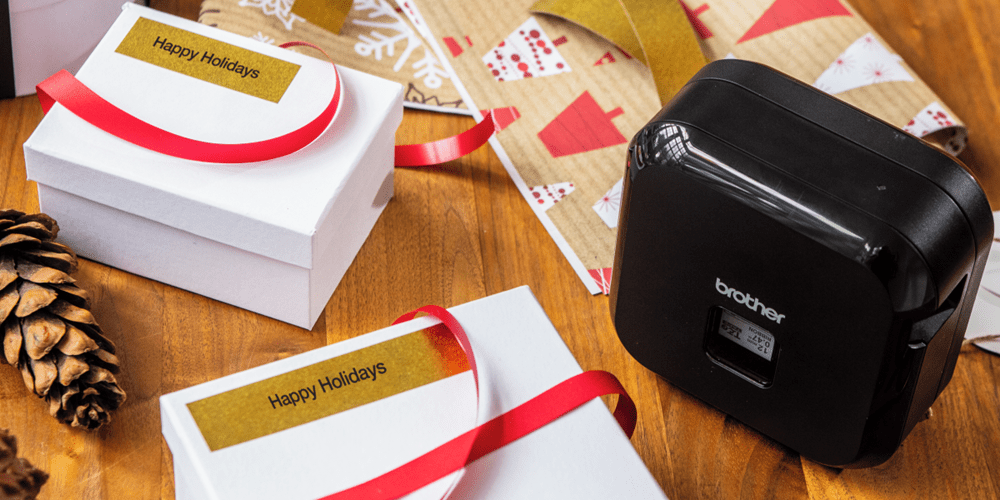
The Brother PT-P710BT Label Printer P-touch Cube can help you create name labels and personalise suitable ribbon tape. Try these festive options:
- For a classic Christmas finish: TZe-RW34 ribbon tape in Gold on Wine Red (12 mm) adds a personal touch to gift boxes and bags. Print the recipient’s name or a short “Made just for you” message before tying it around your gift.
- For something simple and elegant: TZe-R234 ribbon tape in Gold on White (12 mm) pairs beautifully with kraft wrapping paper or a bundle of handmade bookmarks.
- For decorative name labels: TZe-PR851 laminated tape in Black on Premium Gold (12 mm) adds a festive finishing touch to gift tags and boxes.
Choose the right tape for your project: ribbon is non-adhesive and ties around a gift, while adhesive labels stick to suitable surfaces.
For more ways to dress up your finished creations, explore our guide to adding a personal touch to your Christmas gifts.
Make handmade DIY gifts with Brother
A thoughtful gift starts with the person receiving it. What do they love? What would they use? Which shared memory still makes them smile?
Pick an idea, gather your supplies and enjoy making it your own. It doesn’t have to be perfect to mean something. A little thought, a personal touch and Brother at your side can go a long way.
Ready to get creative? Explore Brother Creative Center’s Christmas ideas and find a project to make someone’s day.
Comments

Making DIY Christmas Gift Tags & Labels
Make personalised gift tags, colourful Christmas labels and printed ribbon at home with easy DIY ideas, Brother label makers, tapes and rolls.

What's the Best Printer for Small Business?
Find the best printer for small business. Compare inkjet, laser and A3 printers based on your team, workload and office needs.

A Practical Guide to Electrical and Data Labelling Templates
Explore how Bluetooth workflows, compliant templates and advanced printing tech from Brother simplify durable electrical and warning labels for electricians.

Resource Library
Explore our range of eBooks, Whitepapers & Case studies
Be the first to receive ongoing exclusive offers and the latest news on our products and services directly in your inbox!